What do you do when you have a 3D print and you don't want it too look like it's fresh out of the printer? If it's non metallic you can use a process called antiquing. I've used variations of this process on many of my 3D printed pieces. If done properly, it can add a lot of character to your model and highlight details.
In this posting, I'll go through the basic method of antiquing using easy to acquire materials. We'll start with your bare print and end up with the antiqued piece.
In this posting, I'll go through the basic method of antiquing using easy to acquire materials. We'll start with your bare print and end up with the antiqued piece.
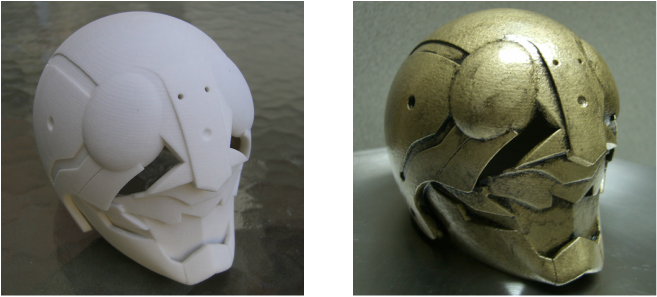
The image on the left is the bare print made from what's commonly referred to as the sandstone material. The image on the right is what we'll end up with.
Supplies needed:
Latex or nitrile gloves or similar
Scouring pad (optional)
Paint brush or sponge brush
Damp paper towels
Covered work surface
Gold base coat (or other colors)
Black or grey water based paint (must be water based)
Clear coat (optional)
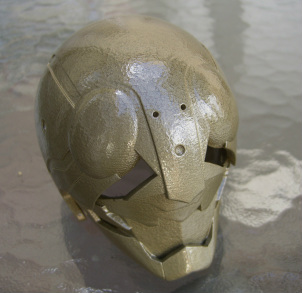
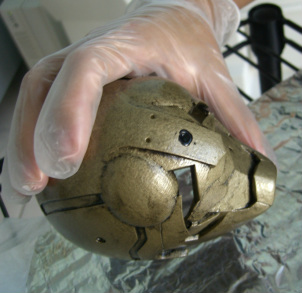
Same model after the gold hammerd metal base coat.
1) Spray 3D print with base coat color ensuring an even, consistent coat of paint. Allow time for adequate drying often 24 hrs for full cure. Follow recommended safety instructions and dry time as per the manufacturer's product label.
2) (optional) If your model has a lot of flat open areas you can use the scouring pad to distress the surface. The antiquing paint get caught in the fine scratches left by the scouring pad and give the flat areas texture. You can be creative and also use this technique for weathering effects.
3) Prepare a covered work surface and have several sheets of damp paper towels. Half sheets work well. The number of sheets will vary according to size of project and level of detail. Use latex gloves to keep your hands clean. This process can get messy. It largely depends on the complexity of the project.
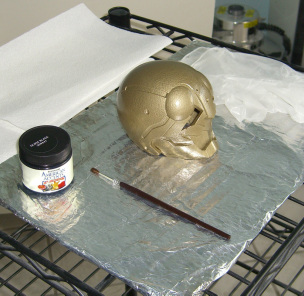
Foil covered work area and supplies.
4) Mix antiquing paint well. Follow manufacturer's label for mixing and safety instructions. For this blog post, I'll be using black paint. However, depending on the look you're going for, the paint could be different shades of black, grey, brown or green especially if you're trying to mimic a patina on a metallic surface.
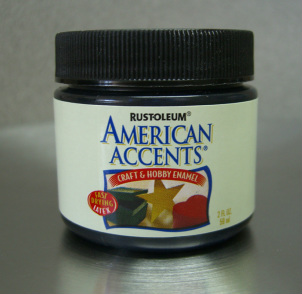
Bottled Rust-oleum black paint.
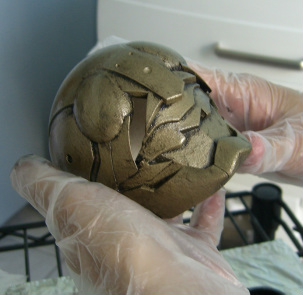
5) Begin brushing or sponging on the antiquing (black paint) coat in roughly one inch square areas. It may be possible to work larger areas again, depending on surface area, detail etc. Immediately wipe off the excess paint leaving the antiquing coat in the corners and recesses of the model. The main goal is not to cover too much area at one time. If the excess paint dries, it becomes permanent.
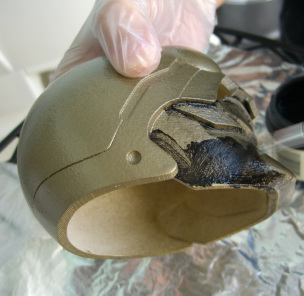
Black paint brushed on a small flat area. If applied to to large of an area at one time, the paint may begin to dry.
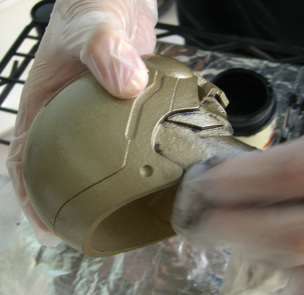
Wipe off the excess paint with a damp paper towel. As you can see the majority of the black paint is removed leaving black in only the crevices.
Some shallow or deep recesses may require re-application of the antiquing paint to get proper coverage.
Removal of the excess paint with a damp paper towel.
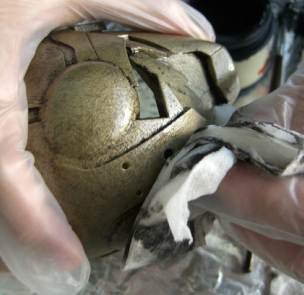
6) Allow the remaining antique coat to dry. Apply a clear coat as an optional step.
Model after the antiquing is finished.
If you have any tips for antiquing please feel free to share them in the comments section or if you have tried the technique, I would love to see your results and the sort of projects you're working on.

 RSS Feed