RussOgi.com
  • Home
  • Blog
  • 3D Printed Art
  • Other Works
  • In The Media
  • Shows

What Knot To Do.

1/25/2018

0 Comments

 
Agemaki knots
What Knot To Do? That's the question I was faced with when working on the Do (torso armor) of my Samurai armor replica.

If you've been following my build.  Thank you.  If so, please skip the next three paragraphs explaining this project.

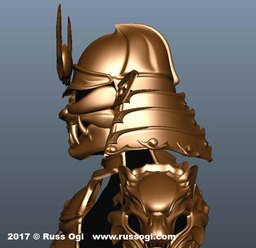
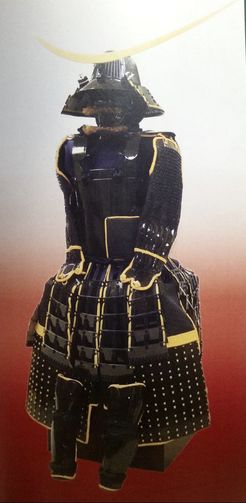
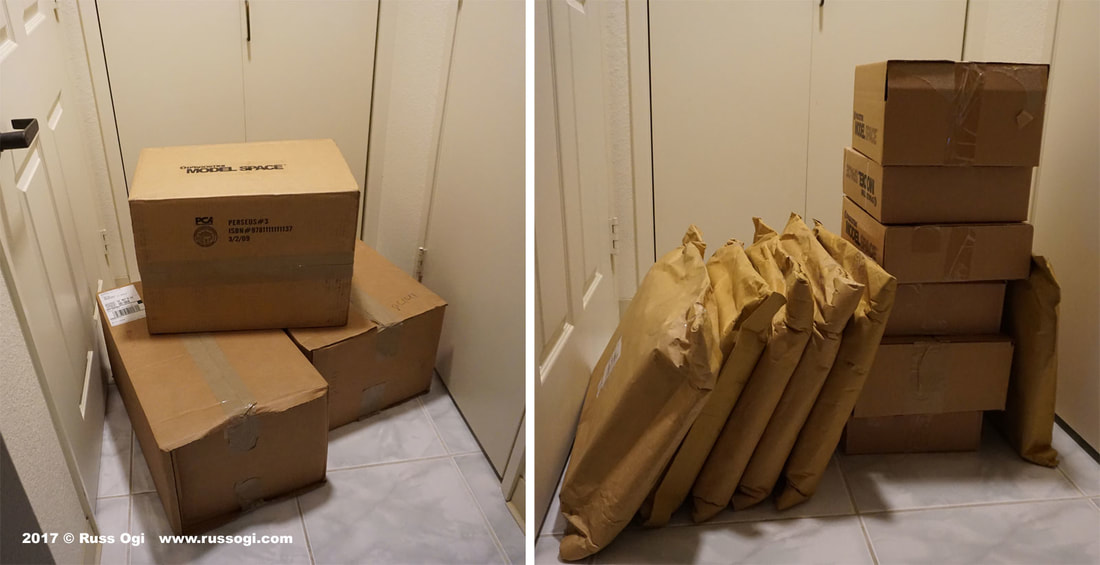
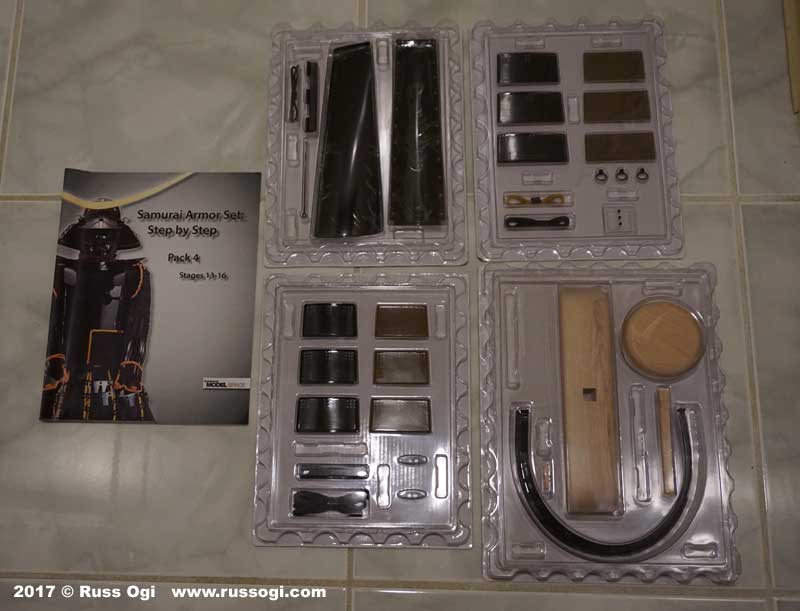
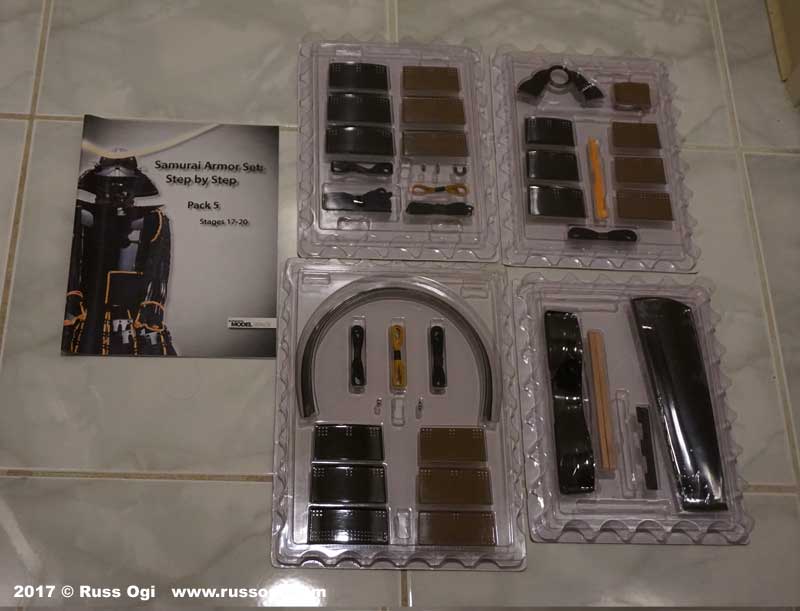
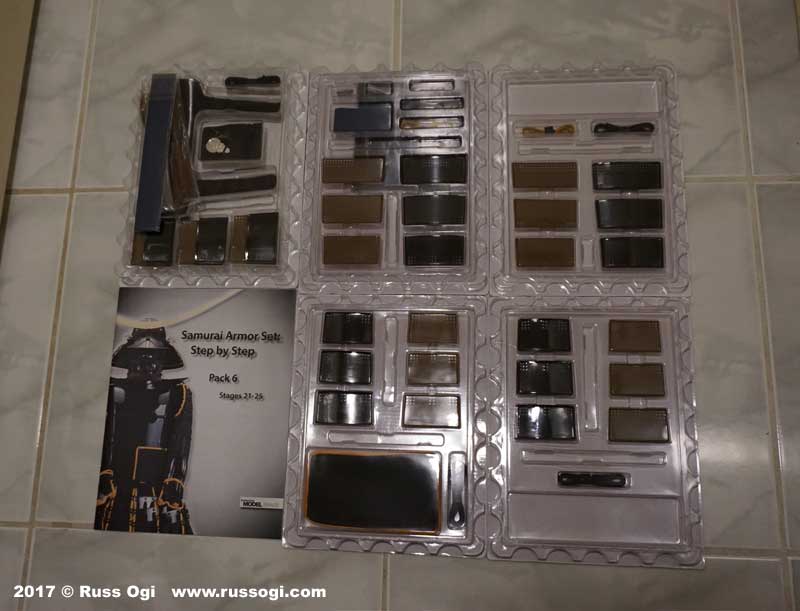
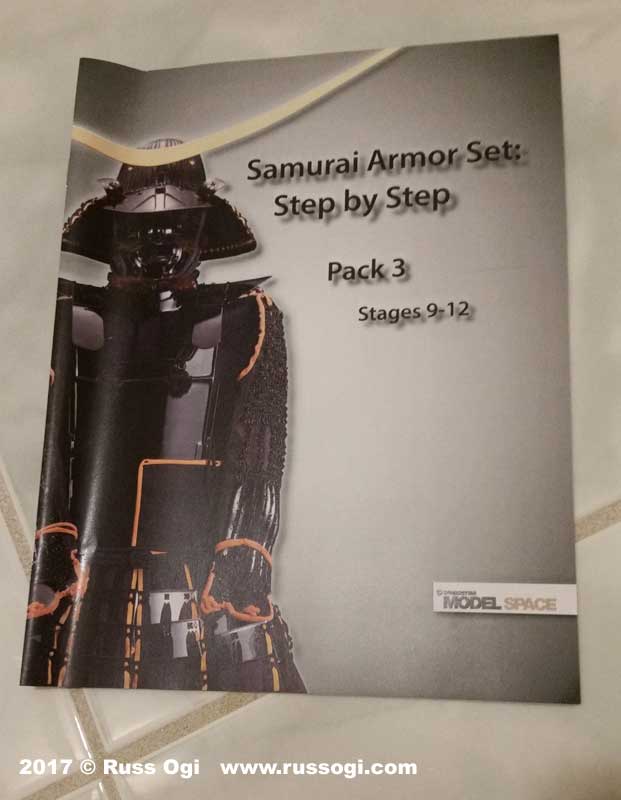
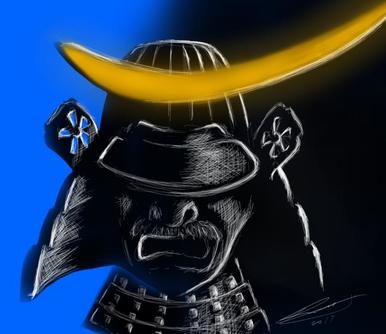
To get more insight into my own armor designs, I am constructing a half-scale model (about 2.5 feet tall when completed) of Feudal Lord, Date Masamune's Samurai armor.

This blog continues with my hands-on study of the design and construction of traditional samurai armor. 

If you're new to my project, welcome.  If you would like to read this blog series from the beginning start here.  I am also writing a build diary on the ModelSpace website here.  In the build diary, I detail the steps taken in the construction of the replica.  My blog here will focus on my thoughts and insights from this project.


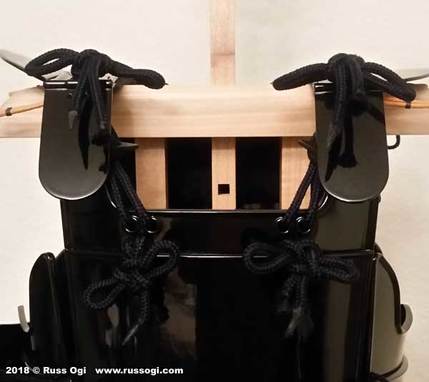
I deviated from the instructions with the knots on the shoulders. The instructions show creating faux knots by looping cord and gluing them in place.

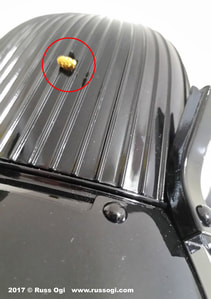
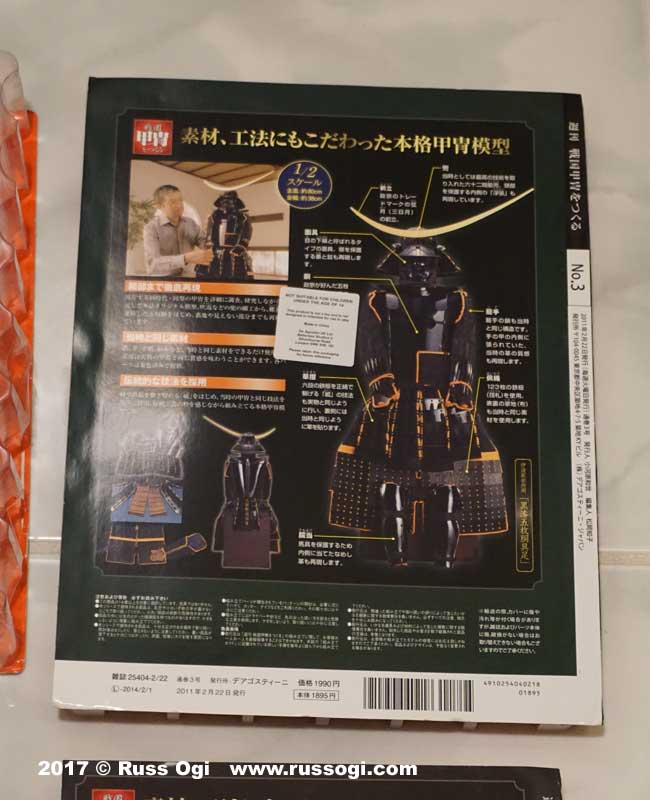
There are often knots in various locations on Samurai armor.  Some are purely decorative, others also have practical applications.

I had not included knots in my own armor designs previously, and this was my first experience with the knots on traditional armor.  It seemed odd to me that Japan armorers would glue rope to create knots rather than tying a knot.

Doing some research, I could not find references to the same knot shown in the instructions (pictured right).


The knot I found most often in various parts of Samurai armor was the agemaki. I've heard it referred to as the dragonfly or clover knot.
knots in instructions
agemaki close up
I decided to use this as the knot on the shoulders of the model. I managed to find both video and diagram instructions on the creation of the knot online.

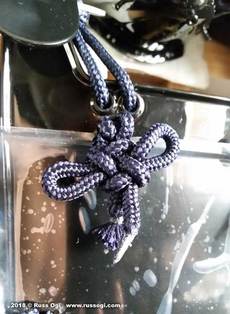
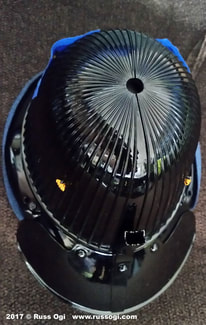
The cords provided with the kit were a bit short for an agemaki. Understandable since they weren't intended for that type of knot.

The agemaki usually have, and look better with, longer tails with full tassels at the ends.  Pictured to the left is how my knots ended up.  Perhaps down the road, I'll change the existing cords for longer ones.

The knots are one of the elements of traditional Samurai armor that I probably would never have looked into had I not started this project.  It led me to learn more about knot tying, their variations, and their meanings.


After working with the agemaki on the Masamune armor, I'm interested in including knots on some of my future armor designs to add another level of traditional aesthetic.

Anyone knowledgeable in knots especially as they relate to the Samurai armor please leave a comment below.​

0 Comments

What Happened?

1/9/2018

2 Comments

 
Dark sky
Thank you to everyone who has been following my blog and my current project – building a half-scale replica of Date Masamune's Samurai armor.

I hope the New Year is off to a great start for all of you.

I undertook building the half scale Samurai armor replica to learn more about the construction of traditional Samurai armor.  The idea was to apply that knowledge to my contemporary Samurai armor designs.


At the beginning, I had the intention of posting a build diary on the ModelSpace forum and a corresponding entry here.

The build diary would focus on the actual construction process while my blog would focus on my thoughts and insights gained from building the replica.

In the real world, things don't always go according to plan.  So what happened?

Punchbowl cemetary statueThe statue "Columbia" overlooking the National Memorial Cemetery of the Pacific where Mom and Dad are inurned.
Back in mid-May 2017, my father passed away after years of struggling with COPD and Emphysema in addition to surviving lung cancer. He fought hard to stay as independent as possible for as long as he could.

Two weeks prior, our dog of almost 18 years lost her struggle with a brain tumor, failing kidneys and dementia and we had to put her down.

In the time leading up to both of those events, my wife and I spent a lot of time caring for both my father and our dog. Needless to say, it was a taxing situation for both of us. I didn't realize how stressful everything really was until...

Two days after my father passed, I came down with the shingles. It's a disease that usually affects older people but my immune system was compromised and my body and mind were overtaxed from the prolonged strain of caring for our ailing family.

After 3 weeks and two trips to the emergency room, the shingles rash and blisters were gone. For people, my age, symptoms and the after effects usually pass quickly. Unfortunately, not for me.

Armor parts
As of this post, it has been 7 months and I still have nerve damage from the shingles. It causes me pain and itching in the affected area and extreme fatigue. It makes it very difficult to focus on tasks.

I find it easier to focus on doing rather than writing. Bottom line, I enjoy making stuff more than writing about it so while I've been adding to my build diary, I haven't kept up with my blog as I had originally intended.

I will be adding entries for the Samurai armor project to my blog soon. Stay tuned.  My New Year resolution I suppose.

Thank you again for following along with my blog and build diary. If you're just joining me on this journey you can start to read the blogs from the beginning here and the build diary here.

Please share this project on Facebook and Twitter. I'd love to hear any thoughts you have.

You can also follow along on Instagram where I'll be posting some additional pictures.

2 Comments

Crowning Achievement: Samurai Helmets

10/12/2017

0 Comments

 
hachi or kabuto crown
I continue my blog series about Samurai armor as I move forward with my build of the half scale replica of Date Masamune's armor.

If you haven't already, please have a look at my previous Samurai armor blogs where I talk a bit about traditional armor and how traditional design influences my Samurai armor designs.

And please follow along my build diary as I continue the construction of this armor replica.  You can find my diary here at the Model Space Forum.  My build diary focuses on the details of the actual build process.

On to the crown or hachi as it is known in Japanese.

The hachi is part of the most iconic section of the Samurai armor - the kabuto (helmet).  It is a key part of the silhouette of the helmet and suit. Traditionally, the hachi is built using wedge shaped sections of metal attached together. Generally, these plates run vertically.

The shape of the hachi is an element of the Samurai armor that sees quite a bit of variation historically and in my own designs.


metal and 3D printed helmetsSteel helmet (left) 3D printed helmet (right)
Although, I don't usually incorporate separate plates into my hachi designs, I often mimic the appearance of plates as decorative elements.

In earlier designs, I ran them horizontally partially in an attempt to differentiate my designs from traditional armor. This is a design choice I started using when working with metal.


My design choice was driven by a decision to differentiate my helmets from traditional armor and reinforce the idea that I am not creating replica armor but extending or continuing the traditional armor design. However, with a few of my more recent designs, I decided to mimic the vertical plates of traditional kabuto.

Momotaro helmet
With my Momotaro armor design, I took another design cue from traditional kabuto and went with the momonari profile for the hachi. The term, momonari, is derived from its profile that is reminiscent of a peach. Often, momonari were constructed of fewer plates.

I thought the momonari shape was very fitting considering the theme for this armor.  The Momotaro armor is based around the Japanese folk tale "Momotaro".  The title translates to Peach Boy.

The momonari hachi is distinctly different from the bowl shape of Date Masamune's kabuto.

hibiki-no-ana shiten-no-byo
While I do appreciate the scale model's attention to detail, I wish the instructions came with more information about the parts of the armor.  More details about construction methods and purpose of various armor parts would be nice.

The Hibiki-no-ana and shiten-no-byo (pictured right) are a good examples.  Not much information about their purpose is included in the model's documentation.

These are spikes and small holes with lacing.  There are four sets of these around the midsection of the hachi.

These elements are decorative but I believe they originally had some association to the shinobi-no-o or chin strap.  I haven't been able to fully confirm that though.


tehen
Another aspect of the model helmet I am curious about is the absence of the tehen-no-kanamono.  The tehen-no-kanamono is the round fitting that surrounds the hole at the top of the crown.

On the model, the hole is present but the tehen-no-kanamono is not.

I have seen historical armor missing the tehen-no-kanamon but usually because it was broken off or otherwise lost but not a kabuto made without one.

Please share any thoughts you have about armor design or information you might have about Japanese kabuto in the comments below.  I would especially love to hear from those who are knowledgeable about armor and Samurai armor.

0 Comments

Building Date Masamune's Armor: The Stand

8/15/2017

0 Comments

 
Armor stand
I decided to start construction of the model with the wood stand.  The assembled stand is pictured to the left.

From my understanding, the wood stand that is included with the model is of the more traditional configuration. 

The other version I've commonly seen looks a bit like the Blair Witch stick figure.

I decided not to glue the stand together so the stand could be disassembled when the armor was stored.  This is also a traditional aspect of wood stands.

You can read more about the construction of the stand in my build diary on the  ModelSpace Forum.

The stand provided with the model includes a nice heavy wood base that provides enough weight to counterbalance the armor.


Picture
Stand parts including a hefty wood base and shoulder cross bar
MannequinFiberglass mannequin pictured with a 2' ruler
For my own full size armor designs, I originally used a fiberglass mannequin. However, shipping a mannequin, even just a torso was size and budget restrictive. 

When I started to travel and show my armor designs at expos, I had to rethink my stand design.  That became a project of its own.

I ended up custom making stands. I used PVC pipe as it was readily available and easy to work with.  I could also easily make a stand that could be disassembled for shipping or storage.

My travel stand for full body armor was based around an inflatable mannequin torso with the PVC frame.

The inflatable mannequin provided the bulk to fill out the do (torso) armor but was light weight and portable.  The PVC frame would handle the weight of the armor.

PictureMy current travel stand configuration
Based on my experience with this model, I'm considering a configuration closer to a more traditional stand.

One of the tricks however, would be avoiding a heavy base in favor of one that is lightweight but could still provide stability.

Please share any thoughts or ideas you have about the design of armor stands in the comments below.

0 Comments

Building Masamune's Armor: Part 1

7/25/2017

4 Comments


The Unboxing

Masamune armorArmor from DeAgostini instructions
My reason for building this model is as a research project for my art work – contemporary Samurai armor. Or maybe “research project” is my justification for taking workday time to build probably the COOLEST scale model I have ever built.

I haven't had the chance to build a scale model kit in years primarily because of work. I've always put off “just for fun” projects. Not to say that some of my work projects haven't been fun to work on. But this one combines the best of both worlds.

My build diary in the ModelSpace Forum will focus on the mechanics of putting the armor together. I'll also have a supplemental posts here, on my blog at russogi.com/blog with insights and other thoughts I have about the armor design and construction and how it has, or will influence my art.

For a more detailed introduction about who I am and my reason for undertaking this project you can go to my introductory post here in the ModelSpace Forum or here on my personal blog.

Now on to the unboxing.

I ordered the entire kit rather than a part-work subscription. So if you're wondering what it looks like when the entire kit arrives in one shot, here it is.

Picture
Inside each of the big boxes are smaller packages each containing one pack. 12 packs in all.  Each pack encompasses several steps.  55 steps for the entire project.  Each pack comes with a full color instruction booklet and each of the steps are packaged in their own blister pack sealed with a cardboard backing.

  Here is a detailed look at each of the 12 packs.  For reference, each floor tile is almost 39.5cm or about 15.5" square.
Pack 1. As the inaugural pack, the packaging includes a red cardboard backing with a graphic on the reverse side.
Pack 1. Close up of the graphic on the reverse side of the blister card. Printed on glossy stock. A nice premium feel.
Pack 2. Plastic blister pack on white backing. Some of the larger plate armor.
Pack 3. Includes parts of the wooden stand.
Pack 4. Includes parts of the back torso armor.
Pack 5. More plate armor.
Pack 6. Include hair for the menpo (face mask).
Pack 7. The awesome McLaren Honda MP4/4.
Pack 8. Cloth for the kote (armored sleeve).
Pack 9. Many small plates for the haidate (thigh armor). Chain-mail!
Pack 10. Another kote and more plates for the haidate.
Pack 11. Suneate (shin guards) parts.
Pack 12. Includes the trademark crescent maedate (front crest).
The correct Pack 7. Some packs come with the required tools. This pack included needle nose pliers for working with the chain-mail.
Detail of one of the instruction booklets that come with the Pack.
Car parts
As you can see, Date Masamune used some of the best technology available in the design of his armor.  This includes parts from a McLaren Honda MP4/4!

In case you missed it in the gallery above, one of these things is not like the others.

Kidding aside, somehow this Pack 7 for the MP4/4 was mistakenly included in my kit in place of the Samurai armor Pack 7. 

In addition to the incorrect Pack 7, the Yoroi bitsu (armor storage box) is missing.  The yoroi bitsu serves as both storage container for the armor and as the base for the wooden display stand to sit.

I quickly contacted DeAgostini customer service and informed them of the errors.

The correct Pack 7 was dispatched at no charge to me.  It did take about 2-3 weeks to make it to me but, being in Hawaii, you accept longer shipping times as part of the price of living in paradise.

Trying to get the storage box however is an on going issue.  More on that later.

wood and metal parts
This is my first model from DeAgostini, and my first impression was set by the packaging.  I was impressed.  Each step comes in a blister pack with a snap-fit backing keeping the parts secure. Both arrive sealed with a cardboard backing. I was surprised at the weight of some of the parts.

The model itself is made of multiple materials including metal, wood, faux leather and multiple types of material.  The kote (armored sleeves) are made of chain-mail.  Half scale chain-mail, how cool is that!

I've been reviewing the instructions online and reading the build diaries of others on the ModelSpace Forum to get an idea of what's ahead.

Since I have the entire kit, I am planning on building the armor in sections rather than following the steps in order. For example, lacing all the kusazuri (tassets) sections at the same time. I find when I work, it's much easier, and more enjoyable, to tackle similar tasks together.

But building out of order presented the problem of keeping parts from getting lost and keeping them organized. There are a lot of parts and many of them are much smaller than they look in the instructions.

Picture
Fortunately, I found that the packaging is durable enough to be opened and closed several times. 

Both top and bottom are contoured to keep the parts in place and snapped together at several points keeping top and bottom securely closed.

This allows me to use them as storage containers making the parts accessible while keeping them organized.

I'll be following up shortly with another post as I start the build.  If you have ever worked on a project like this or have any model making tips, please share your thoughts or stories in the comments below.

4 Comments

Building Date Masamune's Armor

6/26/2017

1 Comment

 
Samurai Armor
How times have changed. When I was a kid, I hated eating vegetables and watching anything educational. I also dreaded research projects in school, especially creating bibliographies.

Now, I eat veggies on a regular basis...ok...I don't dread eating vegetables. I often find the shows on the Science, Discovery and Smithsonian Channels the most interesting things on TV. And I find myself researching almost constantly.

What do I research? Everything. Among other things, cars, electronics, and... armor.

With the armor comes a lot of history, culture and philosophy, in addition to the things you would expect to be associated with armor such as metallurgy, weapons and fighting styles. And lacing!

I love European and Asian medieval armor. But the armor of the Samurai really captures my imagination. The way they are traditionally displayed sitting with their anthropomorphized masks, they look like their own being.

Like they could stand up to greet you or to challenge you.

It's what inspires many of my armor designs. You can see some of my works here.

To that end, I'm about to embark on a research project to learn more about historical Samurai armor functionality and construction by building a ½ scale version of Date Masamune's armor from DeAgostini. I'll be posting a build diary to the ModelSpace USA forum.  Link to my build diary soon.

Who was Date Masamune? For those who want to know more about him but don't trust the Wikipedia entries you can visit the Sendai Museum site. If anyone has better information about Date Masamune please share it in the comments below.

In the ModelSpace USA diary, I'll be focusing on the mechanics of the actual build. Pointing out things I did differently or observations about particular assembly steps.

I'll also do supplemental posts here in my blog. My posts here will focus on my thoughts about the traditional Samurai armor design and construction and how, what I've learned from this build, may influence my future armor designs.

Stay tuned.

Please feel free to leave any thoughts you have about my research project or let me know if you've ever done a build like this as a research project in the comments below. Thanks for stopping by.

1 Comment
    Picture

    RSS Feed

    Author

    Based in Las Vegas but originally from Hawaii, Russ Ogi is a mixed media artist.  His background and passion are in photography and traditional sculpture.

    Raised in a crossroad of cultures, he grew up with Eastern and Western influences. His art reflects that unique fusion of aesthetics and traditions.

    Sculpting in Autodesk Maya, Russ 3D prints his digital model in a variety of media from plaster and plastics to metal.

    From here, his prints often undergo meticulous handcrafting. He often utilizes custom finishing techniques to further instill a feel or emotion into a piece.  

    With almost 20 years of experience in the high-tech industry, and his background in Additive Manufacturing, Russ has also served as a consultant for numerous financial, safety and product development organizations internationally. 

    Among some of his notable clients are the Hawaii State Department of Education, the Joint POW/MIA Accounting Command (JPAC currently DPAA) and the New York Office of the Chief Medical Examiner.

    He has been a sponsored or featured artist with companies such as Autodesk, imaterialise, 3D Fuel  and, LulzBot.

    Archives

    April 2021
    March 2021
    March 2019
    February 2019
    January 2019
    November 2018
    June 2018
    March 2018
    January 2018
    October 2017
    August 2017
    July 2017
    June 2017
    May 2017
    June 2016
    May 2016
    December 2015
    November 2015
    October 2015
    September 2015
    August 2015
    July 2015
    June 2015
    May 2015
    April 2015

    Categories

    All
    3d Printing
    Armor
    Art
    Blockchain
    Cinema
    Educational
    Exhibitions
    Half Scale Samruai Armor Build
    Half-scale Samruai Armor Build
    Personal
    Samurai
    Technology

    RSS Feed

Copyright Russ Ogi 2024

Web Hosting by iPage