RussOgi.com
  • Home
  • Blog
  • 3D Printed Art
  • Other Works
  • In The Media
  • Shows

Building Masamune's Armor: Part 1

7/25/2017

4 Comments


The Unboxing

Masamune armor
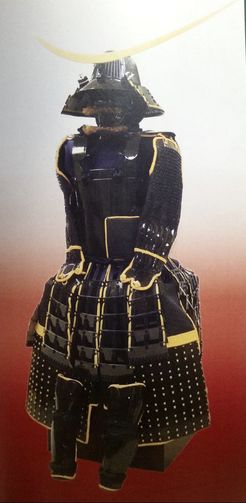
Armor from DeAgostini instructions
My reason for building this model is as a research project for my art work – contemporary Samurai armor. Or maybe “research project” is my justification for taking workday time to build probably the COOLEST scale model I have ever built.

I haven't had the chance to build a scale model kit in years primarily because of work. I've always put off “just for fun” projects. Not to say that some of my work projects haven't been fun to work on. But this one combines the best of both worlds.

My build diary in the ModelSpace Forum will focus on the mechanics of putting the armor together. I'll also have a supplemental posts here, on my blog at russogi.com/blog with insights and other thoughts I have about the armor design and construction and how it has, or will influence my art.

For a more detailed introduction about who I am and my reason for undertaking this project you can go to my introductory post here in the ModelSpace Forum or here on my personal blog.

Now on to the unboxing.

I ordered the entire kit rather than a part-work subscription. So if you're wondering what it looks like when the entire kit arrives in one shot, here it is.

Picture
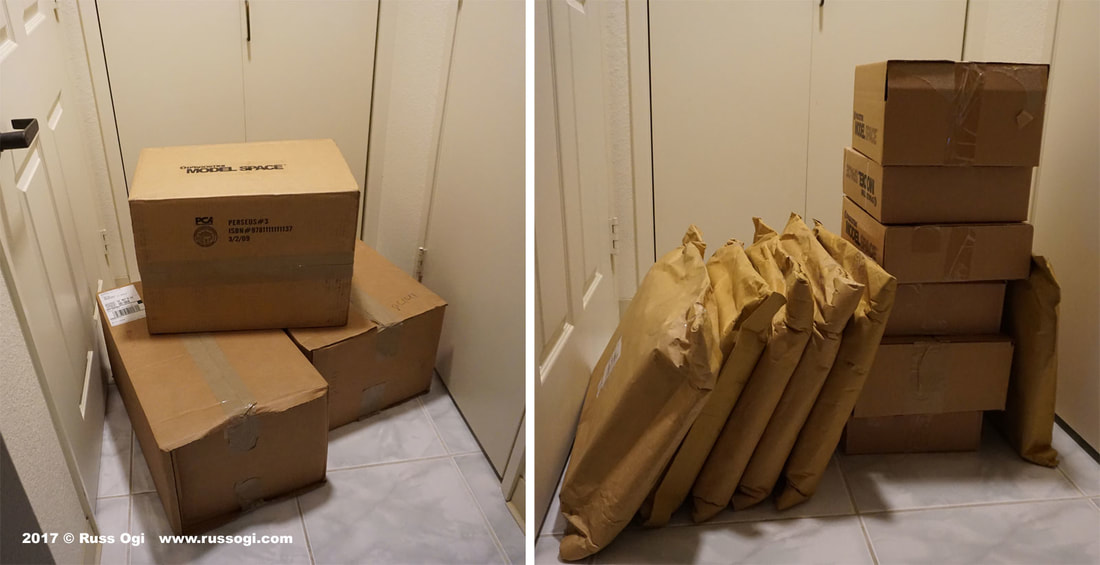
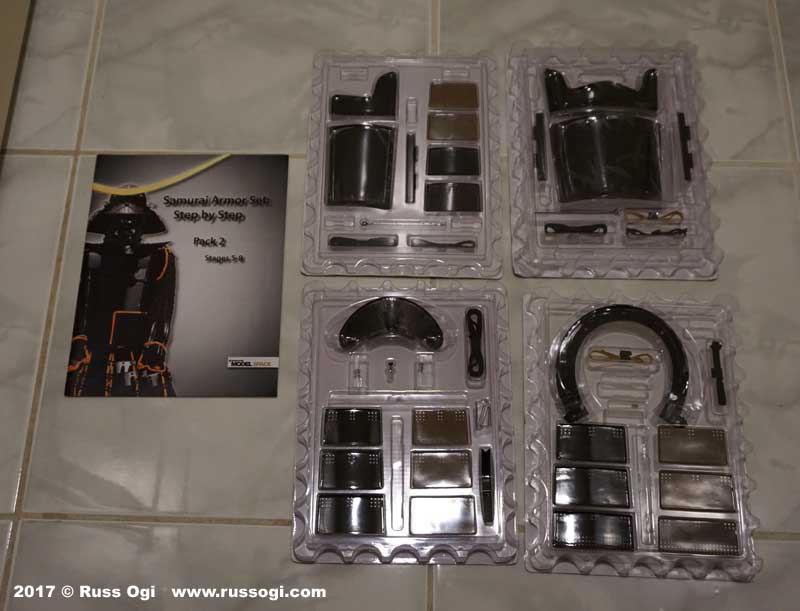
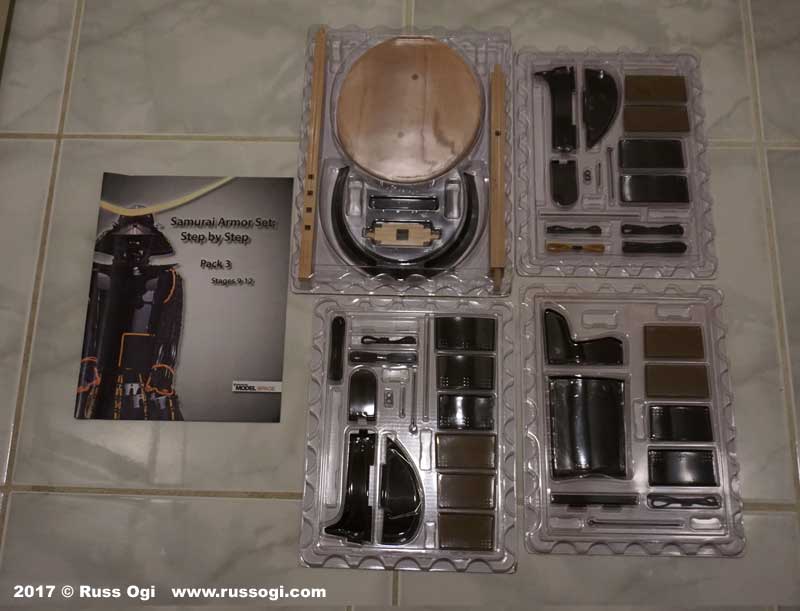
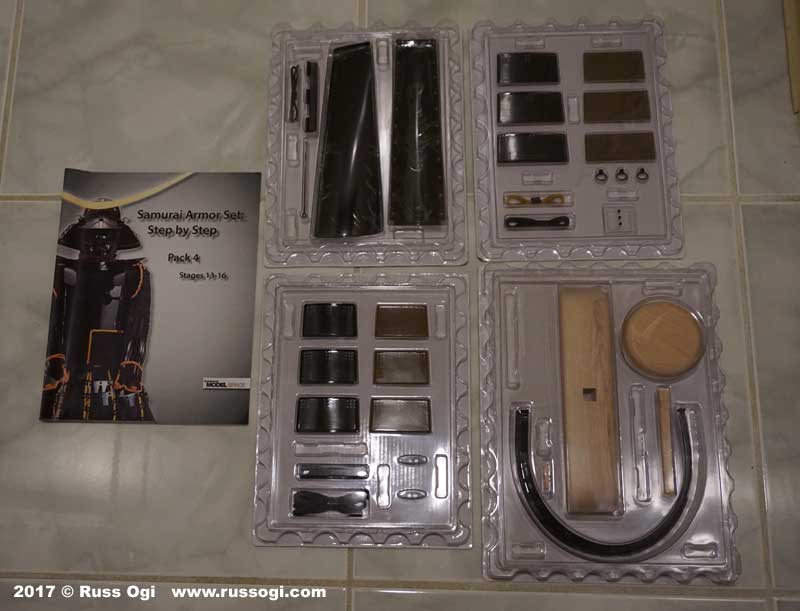
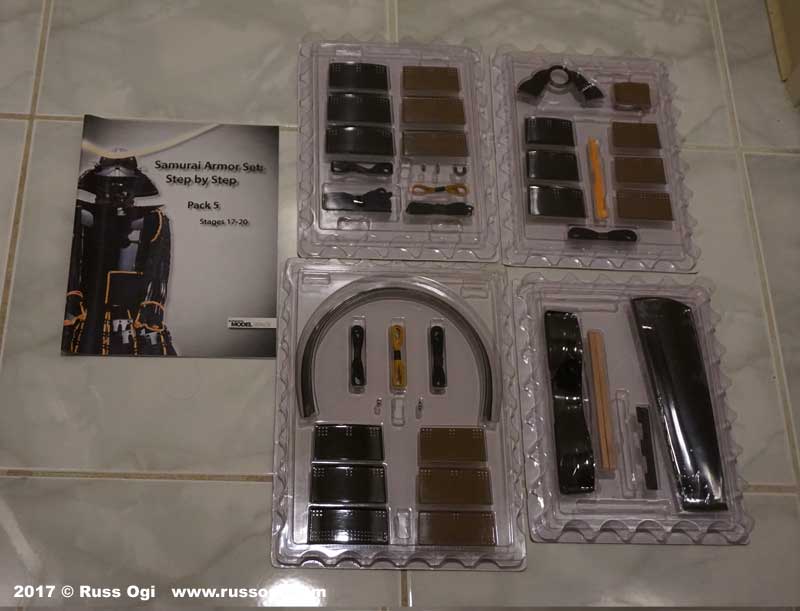
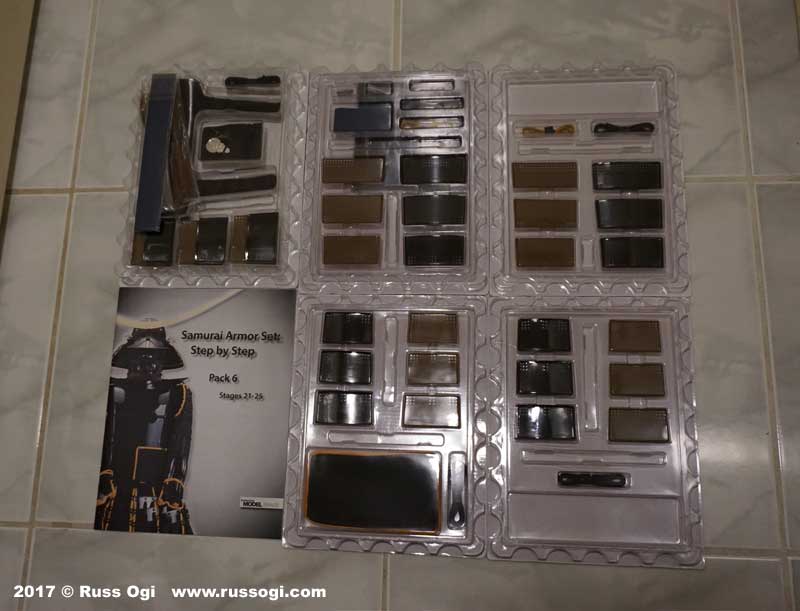
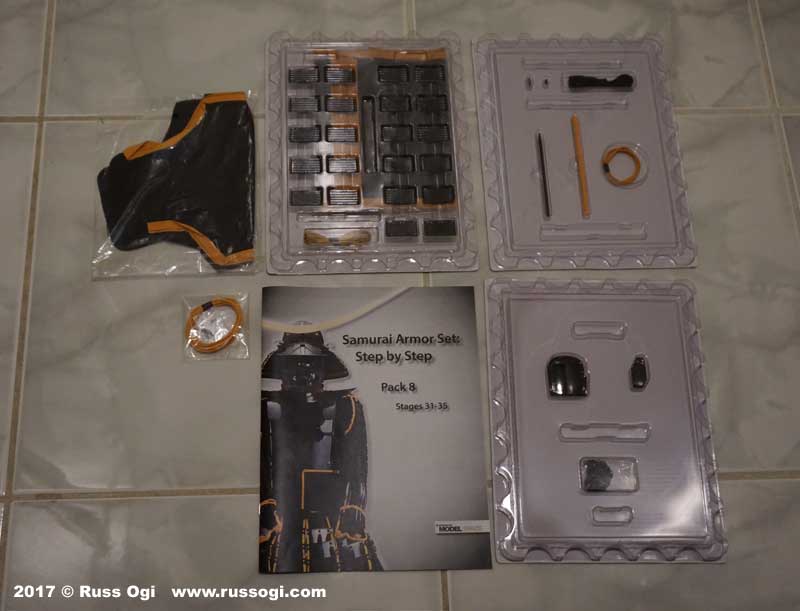
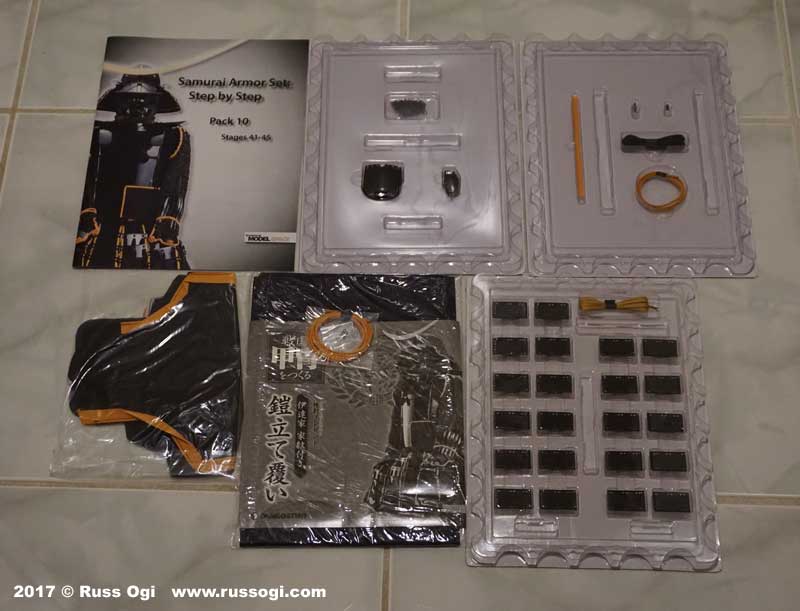
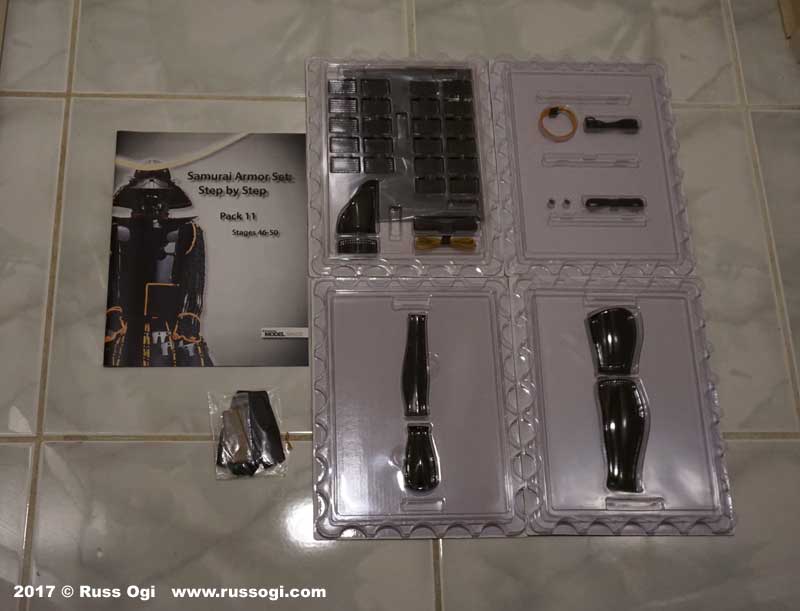
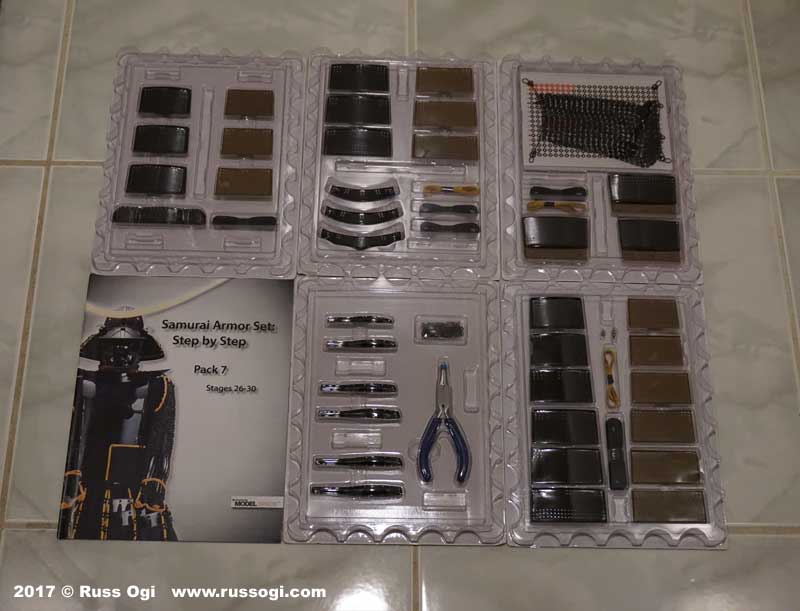
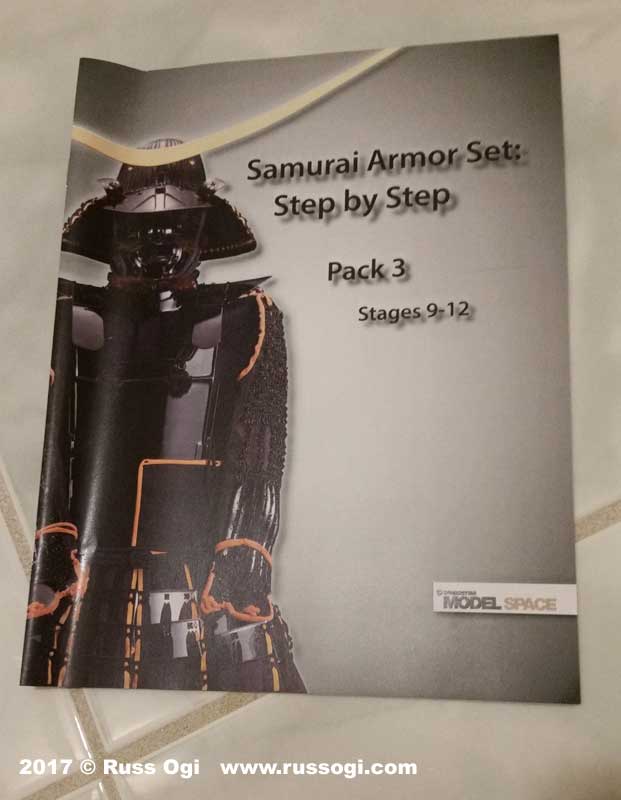
Inside each of the big boxes are smaller packages each containing one pack. 12 packs in all.  Each pack encompasses several steps.  55 steps for the entire project.  Each pack comes with a full color instruction booklet and each of the steps are packaged in their own blister pack sealed with a cardboard backing.

  Here is a detailed look at each of the 12 packs.  For reference, each floor tile is almost 39.5cm or about 15.5" square.
Pack 1. As the inaugural pack, the packaging includes a red cardboard backing with a graphic on the reverse side.
Pack 1. Close up of the graphic on the reverse side of the blister card. Printed on glossy stock. A nice premium feel.
Pack 2. Plastic blister pack on white backing. Some of the larger plate armor.
Pack 3. Includes parts of the wooden stand.
Pack 4. Includes parts of the back torso armor.
Pack 5. More plate armor.
Pack 6. Include hair for the menpo (face mask).
Pack 7. The awesome McLaren Honda MP4/4.
Pack 8. Cloth for the kote (armored sleeve).
Pack 9. Many small plates for the haidate (thigh armor). Chain-mail!
Pack 10. Another kote and more plates for the haidate.
Pack 11. Suneate (shin guards) parts.
Pack 12. Includes the trademark crescent maedate (front crest).
The correct Pack 7. Some packs come with the required tools. This pack included needle nose pliers for working with the chain-mail.
Detail of one of the instruction booklets that come with the Pack.
Car parts
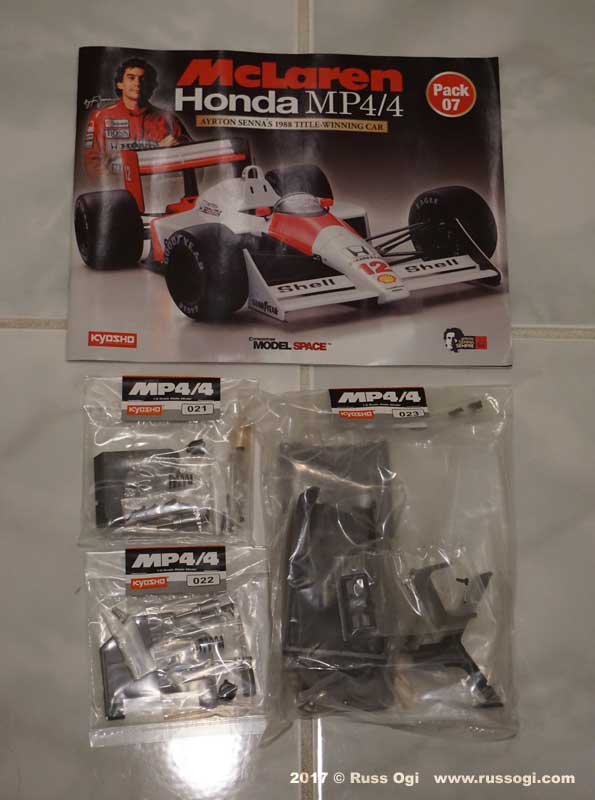
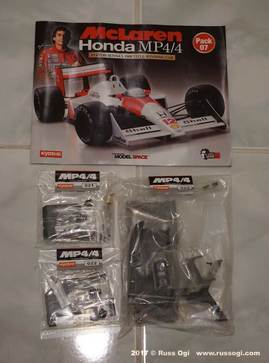
As you can see, Date Masamune used some of the best technology available in the design of his armor.  This includes parts from a McLaren Honda MP4/4!

In case you missed it in the gallery above, one of these things is not like the others.

Kidding aside, somehow this Pack 7 for the MP4/4 was mistakenly included in my kit in place of the Samurai armor Pack 7. 

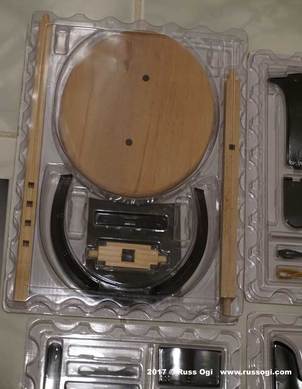
In addition to the incorrect Pack 7, the Yoroi bitsu (armor storage box) is missing.  The yoroi bitsu serves as both storage container for the armor and as the base for the wooden display stand to sit.

I quickly contacted DeAgostini customer service and informed them of the errors.

The correct Pack 7 was dispatched at no charge to me.  It did take about 2-3 weeks to make it to me but, being in Hawaii, you accept longer shipping times as part of the price of living in paradise.

Trying to get the storage box however is an on going issue.  More on that later.

wood and metal parts
This is my first model from DeAgostini, and my first impression was set by the packaging.  I was impressed.  Each step comes in a blister pack with a snap-fit backing keeping the parts secure. Both arrive sealed with a cardboard backing. I was surprised at the weight of some of the parts.

The model itself is made of multiple materials including metal, wood, faux leather and multiple types of material.  The kote (armored sleeves) are made of chain-mail.  Half scale chain-mail, how cool is that!

I've been reviewing the instructions online and reading the build diaries of others on the ModelSpace Forum to get an idea of what's ahead.

Since I have the entire kit, I am planning on building the armor in sections rather than following the steps in order. For example, lacing all the kusazuri (tassets) sections at the same time. I find when I work, it's much easier, and more enjoyable, to tackle similar tasks together.

But building out of order presented the problem of keeping parts from getting lost and keeping them organized. There are a lot of parts and many of them are much smaller than they look in the instructions.

Picture
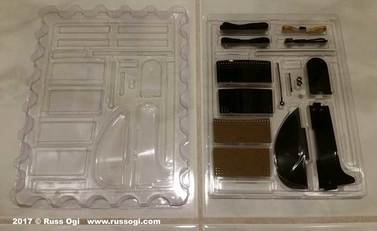
Fortunately, I found that the packaging is durable enough to be opened and closed several times. 

Both top and bottom are contoured to keep the parts in place and snapped together at several points keeping top and bottom securely closed.

This allows me to use them as storage containers making the parts accessible while keeping them organized.

I'll be following up shortly with another post as I start the build.  If you have ever worked on a project like this or have any model making tips, please share your thoughts or stories in the comments below.

4 Comments

Letting The Cat Out Of The Bag Part 3

7/20/2017

0 Comments


Part III: How Do You Bring A Virtual Cat Into The Real World?

Stages of finishingRaw 3D print, primer, finished
If you would like to read about how this project started, you can read part 1 here or part 2 about the creation of the virtual model here.

Once the changes to the virtual model were completed and approved, a 3D printed version of the model was made using a process called Fused Filament Fabrication (FFF).

For those unfamiliar with 3D printing, the software for the 3D printer takes the virtual model and divides it into layers. Depending on the part, this could be hundreds, even thousands of layers.

The layer data is sent to the 3D printer where the machine recreates each digital layer as an outline in plastic. It does this using a plastic filament that is heated and fed through an extruder. Each physical layer is stacked one on top the other.

Each layer is hot enough to adhere to the layer before it. With all the layers stacked on one another the result is a 3D physical replica of the computer sculpture.

PictureSections of the model before assembly
Once the part is 3D printed, it goes through an extensive finishing process. The entire Cat was printed in several sections. Some of the sectioning was done to fit the build chamber of the 3D printer. Other parts were sectioned for ease of painting.

Because the Cat has multiple colors, the different colored parts either need to be painted separately, parts need to be masked or different colors are hand painted.

When parts of a model are supposed to be separate objects, I often prefer creating the parts separately. The Cat's medallion is a great example.

Medallion partsMedallion parts
The Cat's medallion was printed separately from the Cat and the circular “coin” section was printed separately from the Island Insurance logo. In this case, the 3D printer was entirely capable of 3D printing the medallion with logo on the Cat all in one shot.

But if everything was one piece, to paint the medallion blue would have meant masking the Cat and logo in order to paint the blue or would have required careful brush painting by hand.

I often spray paint rather than brush as it's quicker and you don't have concerns about brush strokes in the finish.  But doing so usually requires masking with finishes that have multiple colors.


Printing separate parts is one of the construction strategies I use to make fabrication easier. Often, this adds extra time in the CAD modeling stage of the project but can save considerable effort on the physical finishing side. Also, the finished product looks better and generally feels higher in quality.

Alignment pointsAlignment points
With the computer model, I can ensure the parts fit perfectly.  The trick is to make sure that the virtual precision translates into the physical model.

To ensure each section lines up as accurately as possible in the real world, I create alignment points in the computer model.  The alignment points are pits that I fit small dowels into.  In this case, I use BBQ skewers.

The alignment points are 3D printed as part of the model.  In the picture to the left, you can see the alignment points some of which have the wooden dowels in them.

partial assemblyPartial assembly
The first step is assembly. I didn't assemble all the parts at the same time. I attach the main sections like the head and body halves frist. 

I then attach the assembled head to the assembled body.  I leave the raised arm, the medallion and logo separate until later.


After the initial assembly, I give the sections a rough sand to reduce the printlines. Then, I use a filler to even out the surface. It's the same basic process that auto body shops use.

Once the model feels smooth, I do a primer coat of paint. The primer generally helps the paint adhere to the plastic and depending on the 3D print material, helps to seal the surface of the model.  The image to the left shows the first coat of primer.

This first coat of primer also helps to show any places on the model's surface that needs more attention.


When I am satisfied with the model's surface, I apply a final primer coat.  The Cat then gets an undercoat of black. At this point, I attach the head and right arm so I can blend the seams for those parts before the final paint goes on.

Hand painted sectionsHand painted sections
After the arm is attached, I start the final top coat of white paint. I opted to hand paint the collar red instead of masking it off. The decision to mask or brush paint is often a preference of the artist.

Each technique offers different benefits and limitations.  I find that the situation usually dictates which technique I use.


I chose to brush paint the collar since the painted edges were well defined and getting the tape under the raised arm would be difficult. I also chose to hand paint the paws and slippers for similar reasons.

Almost finishedAlmost finished
Last but not least, was the face. I again chose to freehand the painting of the Cat's facial features rather than tape masking. I used a magnifying glass to make sure I got clean painted edges. Since the face was the focal point, this painting was especially nerve wracking.

The pupils were a bit tricky. To get the shiny look of eyeballs, I opted to apply a gloss coat of clear nail polish over the black and white paint. The self leveling and quick drying nature of nail polish was perfect for the eyes.

The picture on the left shows the Cat's eyes prior to the gloss coat.


With that, the Island Cat was done. Thanks for following along. Please share any painting or fabrication techniques you use in the comments below.

0 Comments

Who Needs The New Surface Pro?

7/16/2017

0 Comments

 
Surface Pro 4.5
It's pricey, it's not the fastest, it's not the lightest, it's not the most compact and it doesn't have the best battery life but... looking through all the Surface Pro clones, 2-in-1 computers and tablets on the market today, the 2017 Surface Pro is still the the best full desktop computer system in a tablet form factor.

So who needs the new Surface Pro?  It is ideal for the person who needs it's unique form factor.

By the way, I refer to the 2017 Surface Pro as the Surface Pro 4.5.

Bottom line:  If you're like me, and have mid to high end general processor needs, a need for a good stylus for drawing and value the comfort of working on the same computer wherever you go, then the Surface Pro 4.5 may be the computer for you. 

However, if you have specific, high end needs from your computer, like heavy video editing, gaming or 3D rendering, the Pro 4.5 might be a good choice as a second computer or you might look at a cheaper Pro 4.5 clone.  If your second device is going to be used mostly for media consumption then a tablet may be a good choice.

If you're looking at the 4.5 as a second computer, then purchasing a lower end or older model might be a good way to save some money.  Pro 4 prices have dropped dramatically since the release of the 4.5. 

Microsoft has gotten bashed for not including their keyboard and Surface Pen as part of the 4.5 but this actually allows you to scale your purchase up or down depending on your specific needs. 

For example, if you don't need much from the stylus, you can either not buy a Surface Pen or buy the, less expensive older model.  I believe some 3rd party styluses work with the Surface Pro. 

Same goes with the keyboard.

You also don't even need to buy a new keyboard or pen if your old keyboard and pen are still working properly.

Surface PenNew Surface Pen sold separate but backwards compatible
By making their Surface Pro hardware backwards compatible, Microsoft has created a modular system allowing the user to customize their hardware choices to best suit their needs and budget. 

I got the business bundle and opted for the i5 8gb of RAM but I didn't want the premium Alcantara covered keyboard.  Instead, I opted for the older Pro 4 keyboard with fingerprint ID.

I've been using a version of the Surface Pro for the past several years.  What do I use it for?  Everything -  from email and web browsing to sketching to 3D computer modeling.  I use it as my primary computer and it allows me to work on my primary computer wherever I go.  I even use the built in Surface screen almost exclusively.

It may not seem like a big deal, but I found that when I use a computer, for my art especially, the subtle differences between computers can be distracting and I lose my rhythm or focus on my work.  It's the small things like file locations, changes in UI and even the feel of the keyboard or mouse.

Whether it's going from home to an office or traveling to another country, as an artist, I like working on a system that feels the same.  A system that's mine. When I'm on the computer for hours at a time, I know where everything is and it feels natural.  When I jump on another machine, it's like staying in a hotel, it might have everything you need but it's just not home.

If you want to know my history and why I'm so sold on the "tablet PC" format, you can read more in my blog post, "How I Got To The Surface (Pro 3)".

The Surface Pro 3 and 4.5 allow me to have my home with me all the time.  It's compact enough that I can take it with me even if I'm not sure I'll need a computer.  It's powerful enough that I can create my 3D works in Maya.

I don't do a lot of rendering in Maya but I often work with 3D models upwards of 600,000 polygons.  There is sometimes a lag with the Pro 3 and digital drawing if I'm doing fast, heavy crosshatch but I'm not strictly an illustrator so it still works for me.

For 3D digital artists that deal with complex renders or renders with simulations, heavy video processing or artists that rely on illustrating, the 4.5 may not be enough even at the high end i7 version.  If you require specific GPU processing power, like gamers  often do, then the 4.5 would probably not be your primary computer.

My work doesn't seem to push the boundaries too much, or maybe I have low expectations.  Either way, the 4.5 has enough processing power combined with a good stylus in a compact form factor that meets my needs.  If your needs sound like my needs, the Pro 4.5 may be a good fit.

I don't care what the marketing material says, there are always compromises.  Even with the Surface Pro 4.5.  From my research, it is one of the higher priced options but if you can afford it, you make the least amount of compromises for devices with a full OS in a convertible form factor.  What you have is high end power with maximum versatility.

Do you own a Surface Pro 4.5 or are you thinking of buying one?  Please share your thoughts in the comments below.

0 Comments
    Picture

    RSS Feed

    Author

    Based in Las Vegas but originally from Hawaii, Russ Ogi is a mixed media artist.  His background and passion are in photography and traditional sculpture.

    Raised in a crossroad of cultures, he grew up with Eastern and Western influences. His art reflects that unique fusion of aesthetics and traditions.

    Sculpting in Autodesk Maya, Russ 3D prints his digital model in a variety of media from plaster and plastics to metal.

    From here, his prints often undergo meticulous handcrafting. He often utilizes custom finishing techniques to further instill a feel or emotion into a piece.  

    With almost 20 years of experience in the high-tech industry, and his background in Additive Manufacturing, Russ has also served as a consultant for numerous financial, safety and product development organizations internationally. 

    Among some of his notable clients are the Hawaii State Department of Education, the Joint POW/MIA Accounting Command (JPAC currently DPAA) and the New York Office of the Chief Medical Examiner.

    He has been a sponsored or featured artist with companies such as Autodesk, imaterialise, 3D Fuel  and, LulzBot.

    Archives

    April 2021
    March 2021
    March 2019
    February 2019
    January 2019
    November 2018
    June 2018
    March 2018
    January 2018
    October 2017
    August 2017
    July 2017
    June 2017
    May 2017
    June 2016
    May 2016
    December 2015
    November 2015
    October 2015
    September 2015
    August 2015
    July 2015
    June 2015
    May 2015
    April 2015

    Categories

    All
    3d Printing
    Armor
    Art
    Blockchain
    Cinema
    Educational
    Exhibitions
    Half Scale Samruai Armor Build
    Half-scale Samruai Armor Build
    Personal
    Samurai
    Technology

    RSS Feed

Copyright Russ Ogi 2024

Web Hosting by iPage