 Momotaro illustrated by George Suyeoka
 Unpacking from the move to Las Vegas, I discovered a long-lost book. A beloved story from my youth.
At 5 years old, some of my fondest memories were of my Mom reading stories to me. A tradition passed down through generations. It continues as I've watched my cousin read to her son.
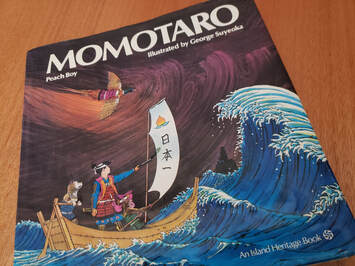
One of those stories read to me was a Japanese folktale called "Momotaro". The title translates to "Peach Boy".
There are variations of the story, but the one I grew up with came from this 1972 Island Heritage book, illustrated by George Suyeoka.
At 5 years old, some of my fondest memories were of my Mom reading stories to me. A tradition passed down through generations. It continues as I've watched my cousin read to her son.
One of those stories read to me was a Japanese folktale called "Momotaro". The title translates to "Peach Boy".
There are variations of the story, but the one I grew up with came from this 1972 Island Heritage book, illustrated by George Suyeoka.
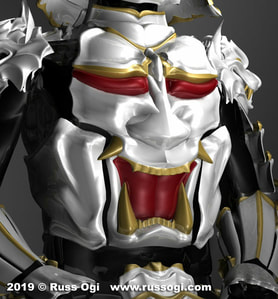
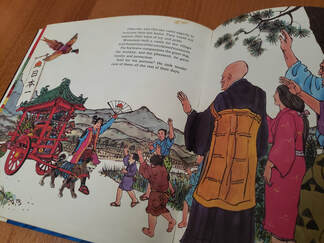 Victorious homecoming
 In this version, an elderly couple wishes for a child of their own. Their wish is fulfilled when a baby emerges from a giant peach they find. The boy is hardworking and becomes a skilled samurai.
He eventually embarks on a journey to free his homeland from the tyranny of evil oni (Japanese ogres/demons). On his journey, he befriends a dog, monkey, and pheasant. Together they travel to a remote island to confront the oni.
They defeat the ogres and return the village treasure.
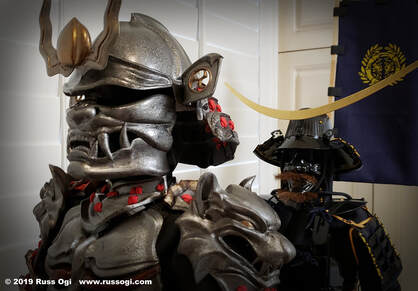
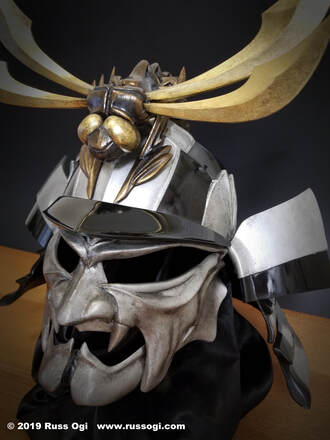
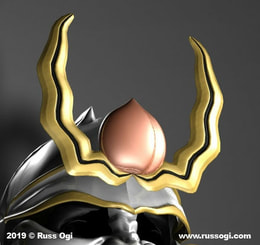
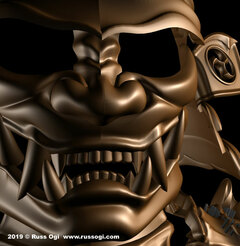
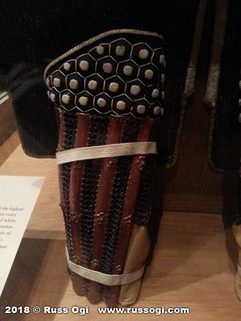
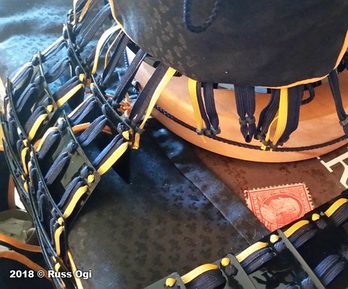
I remember asking my Mom to read me the story over and over again. I was so inspired by the book that decades later, it became the inspiration for one of my samurai armor designs.
After finding it, I re-read the book looking at it through adult eyes. The illustrations for the story were so ingrained in my memory that I remember details of the drawings. I remembered the imagery more than I did the words.
That's why I became a visual artist I suppose.
He eventually embarks on a journey to free his homeland from the tyranny of evil oni (Japanese ogres/demons). On his journey, he befriends a dog, monkey, and pheasant. Together they travel to a remote island to confront the oni.
They defeat the ogres and return the village treasure.
I remember asking my Mom to read me the story over and over again. I was so inspired by the book that decades later, it became the inspiration for one of my samurai armor designs.
After finding it, I re-read the book looking at it through adult eyes. The illustrations for the story were so ingrained in my memory that I remember details of the drawings. I remembered the imagery more than I did the words.
That's why I became a visual artist I suppose.
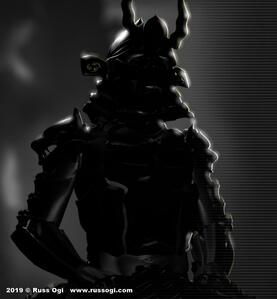
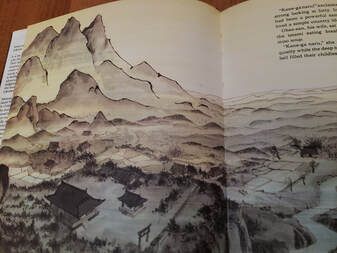 Momotaro's home
 Renderings of landscapes and waves felt reminiscent of Japanese woodblock prints. But the illustrations display a fusion of aesthetics as characters had a distinct Hawaii style to their appearance.
I guess it's fitting that I chose this particular rendition of Momotaro to pattern my armor after since it's mix of Eastern and Pacific styles mirror the fusion of Eastern and Western aesthetics in my own art.
As I reflected on the book's artwork, I noticed how violent the story was. There was mention of the oni who "rob and torture and kill" villagers and a description of the dog who "bit off the guard's heads".
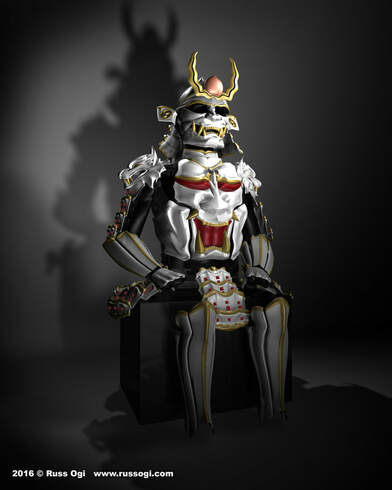
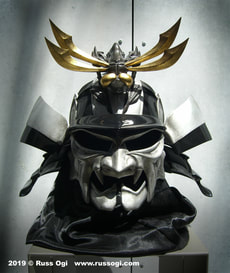
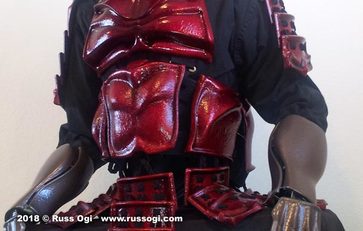
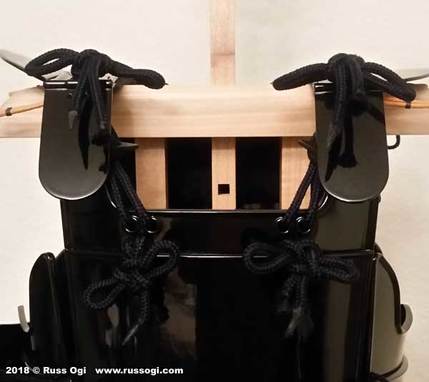
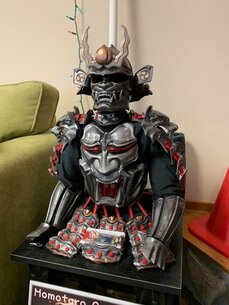 Momotaro artist proof at 3D Fuel Headquarters
 A bit graphic for a modern children's book?
Maybe I'll ask my cousin if she thinks the story is too violent to read to her 5 year old. But I turned out ok - I think.
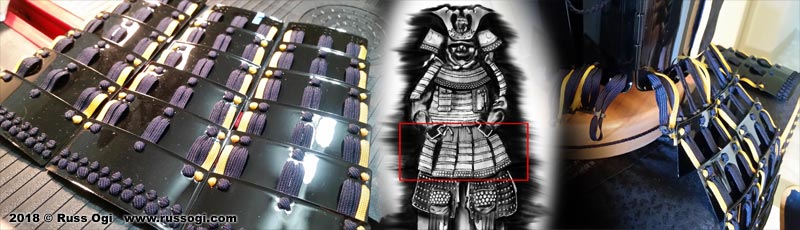
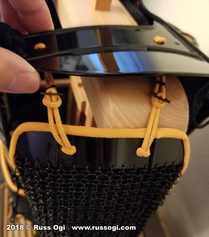
If you'd like to read more about my Momotaro armor design inspired by this book click here.
In the coming weeks, I'll be starting to 3D print a full-size version of my Momotaro armor with the help of my friends at Lulzbot and 3D Fuel. Stay tuned.
The artist proof is currently on display at 3D Fuel headquarters in North Dakota.
Please share your favorite folktale you grew up with in the comments below.
A hui hou.
Maybe I'll ask my cousin if she thinks the story is too violent to read to her 5 year old. But I turned out ok - I think.
If you'd like to read more about my Momotaro armor design inspired by this book click here.
In the coming weeks, I'll be starting to 3D print a full-size version of my Momotaro armor with the help of my friends at Lulzbot and 3D Fuel. Stay tuned.
The artist proof is currently on display at 3D Fuel headquarters in North Dakota.
Please share your favorite folktale you grew up with in the comments below.
A hui hou.


 RSS Feed